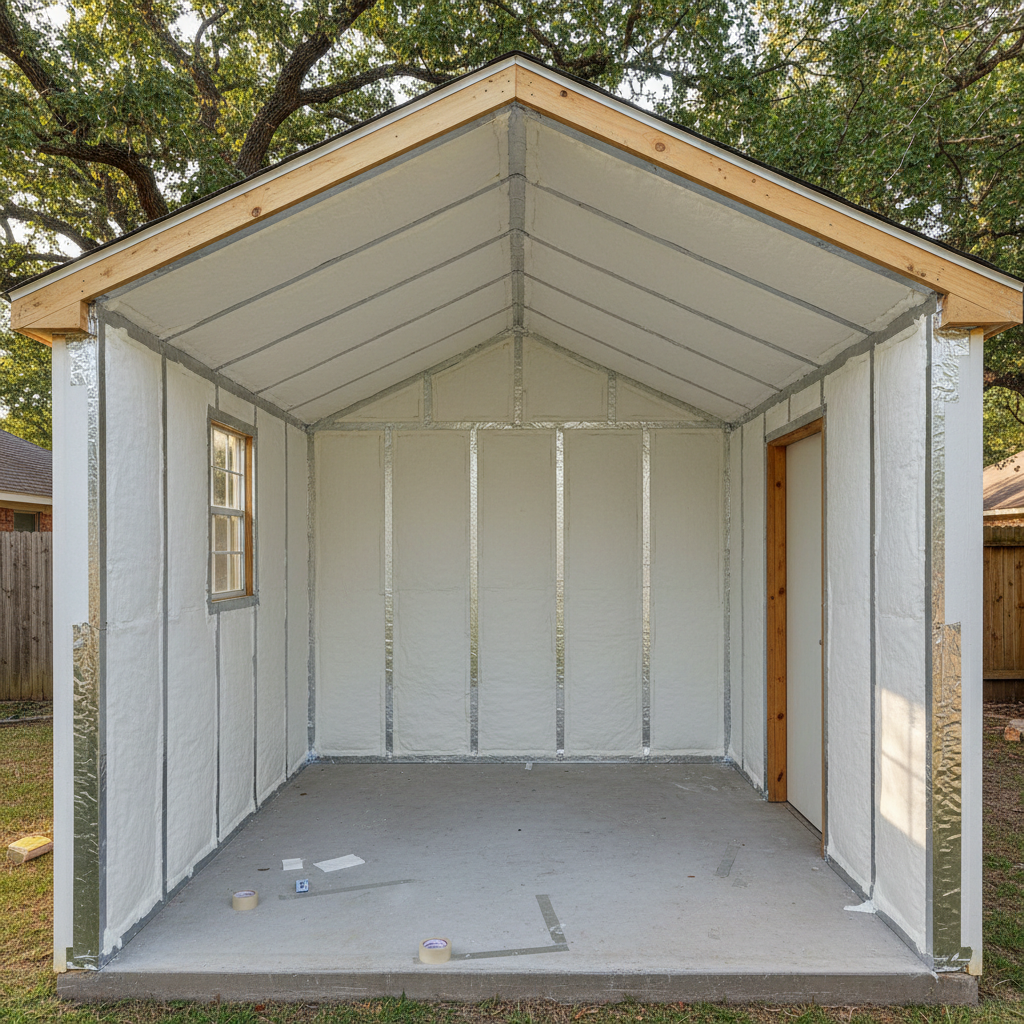
So, you're thinking about insulating your shed. Maybe it's going to be a workshop, a home office, or just a spot to keep your tools from baking in the summer sun or freezing during our occasional winter snaps. Smart idea. A well-insulated shed isn't just about making it comfy; it keeps your stuff safe and can even save you some cash if you're running any kind of climate control out there. But where do you even begin?
Your Project Timeline: What to Expect
Let's talk about how long this usually takes. It's not typically a multi-week saga, but it's not a quick afternoon project either. From your first thought to the finished product, here’s a rough idea of the steps:
- Initial Research & Quotes (1-2 weeks): You're actually doing this part right now. You'll want to get a few different quotes, understand the various insulation types, and see what local contractors offer. Don't rush this stage, okay?
- Scheduling (1-4 weeks out): Good contractors are often busy, especially during peak times like spring and fall when everyone's getting their outdoor spaces ready. Once you pick someone, they'll usually book you a few weeks down the road.
- Preparation (1-3 days before): This part is mostly on you. We'll get into the specifics below, but clearing out the shed is the big one.
- Installation Day (1-2 days): For most standard sheds, the actual insulation work usually wraps up in a single day. Larger or more complex sheds might need a second day.
- Curing/Ventilation (1-2 days post-install): If you go with spray foam, there's a curing period, and you'll need to keep the shed really well-ventilated for a day or two afterward. Your contractor will tell you exactly what to do.
All told, you're probably looking at about a month from deciding to get it done to actually being done, depending on how fast you move and when your chosen contractor is free. Don't let that put you off, though; it's definitely worth the wait.
What Happens During the Process
Once the crew arrives, here's the general flow:
First, they'll walk through with you quickly to confirm the work and answer any last-minute questions you might have. Then, they'll protect the surrounding area. This means putting down tarps or plastic sheeting to catch any overspray or debris, especially if they're using spray foam. They'll also make sure any windows or doors are properly taped off.
Next comes the actual insulation. The process will vary a bit depending on what you chose – whether it's spray foam for a super tight seal or maybe batt insulation for a simpler approach. With spray foam, you'll hear the equipment running, and there will be a distinct smell during application and for a while afterward. That's totally normal. If it's batt insulation, it's a quieter, more manual process of fitting the material into the wall and ceiling cavities.
After the insulation is in, they'll clean up the work area, take all their equipment and protection away, and do a final inspection. They'll also give you specific instructions for after the install, like how much ventilation you'll need or what to do if you plan on finishing the interior walls later.
How to Prepare Your Shed
This is where you come in. Your preparation makes a huge difference in how smoothly the job goes, and it can even save you money if the crew doesn't have to spend time doing it. Here’s your checklist:
- Clear it out: This is the biggest one. Every single item needs to come out of the shed. Tools, boxes, lawnmowers – everything. We need clear access to all walls, the ceiling, and any floor joists if you're insulating the floor.
- Clean it up: Sweep out any cobwebs, dust, or debris. A relatively clean surface helps the insulation stick better, especially spray foam.
- Address repairs: Before we insulate, make sure your shed is structurally sound. Fix any leaky spots in the roof, replace rotten wood, and seal up any major holes where critters could get in. Insulation won't fix a leaky roof, after all.
- Ventilation: If you have existing vents, make sure they're clear. If you're adding new vents, consider installing them before insulation, especially if you're going to finish the interior walls later.
- Electrical: If you have electrical outlets or wiring, let your contractor know. They'll need to work around these, and it's good for them to be aware of the layout.
Seriously, clearing out the shed is the most important step. Don't underestimate it.
Questions to Ask Before Signing a Contract
You've got a few quotes, now it's time to dig a little deeper. Don't be afraid to ask these questions:
- What kind of insulation do you recommend for my shed, and why? They should be able to explain the pros and cons of spray foam, batt, or rigid foam for your specific situation. For instance, here in San Marcos, our humidity can be a factor, so a good vapor barrier is key.
- What's included in the quote? Does it cover materials, labor, cleanup, and disposal? Are there any hidden fees?
- How long will the installation take? Get a firm estimate.
- What kind of warranty or guarantee do you offer on your work? A reputable company like Infinite Insulation stands behind their work.
- What preparation do I need to do before you arrive? Confirm the clear-out expectations.
- What safety precautions do you take during installation? This is especially important for spray foam.
- Can you provide references from other shed insulation projects? A good contractor will be happy to share.
- Are you licensed and insured? Always, always ask this. You really don't want uninsured workers on your property.
Insulating your shed is a smart move. Do your homework, ask the right questions, and prepare properly, and you'll have a much more functional space in no time.